Assign a User Account to a Business Unit
The Business Unit feature lets a Loyalty client support multiple brands or subsidiaries within a single Loyalty platform environment. At a User Account level, a user can be assigned to one or more Business Units. When working within Loyalty, the user can pick from among the set of Business Units to which they have been assigned. This selection, referred to as the Business Unit context, controls what the user sees, and the Members and data that they can access. For more information, see Getting Started with Business Units.
Note: Business Units are an optional feature that must be enabled in your Loyalty account. Speak with your Zeta team for more information on enabling this feature.
To assign a User Account to a Business Unit:
-
Select Admin from the top navigation bar, then select Access > Console Users from the side navigation menu. The Console Users screen is displayed.
-
Optionally, search for and select the desired User Account (see Search for a User Account for more information on the available search options). The User Account Details screen is displayed with the Roles tab selected.
-
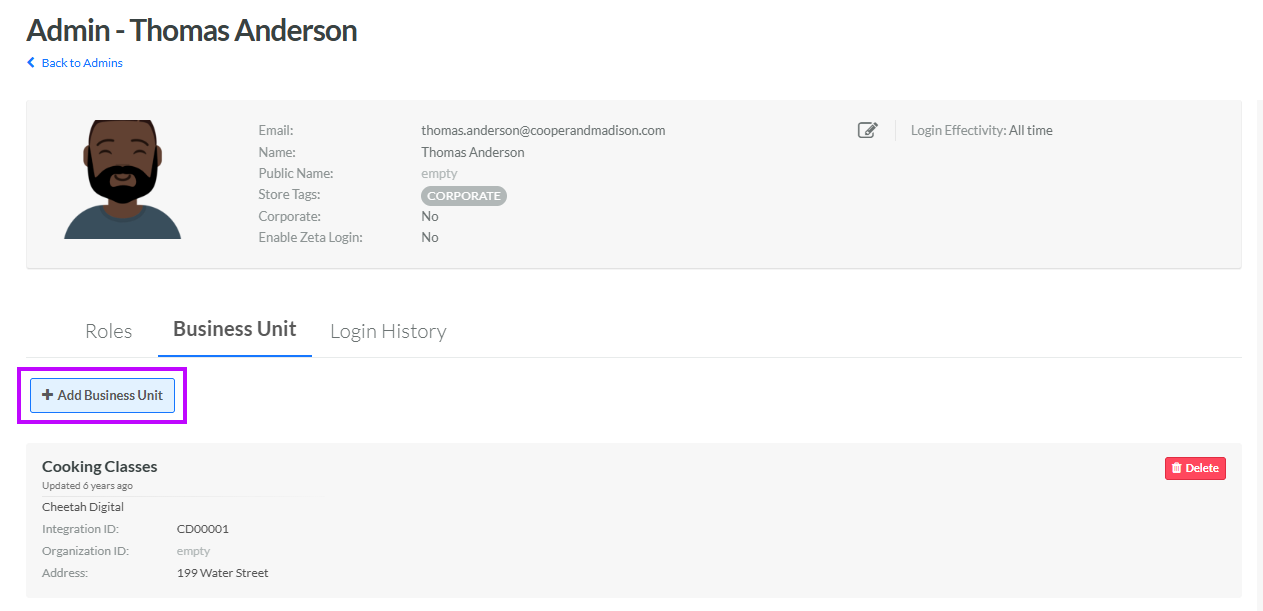
Select the Business Unit tab. This tab is displayed only if the Business Unit feature has been enabled in your Loyalty account.
-
Click Add Business Unit. The New Admin Business Unit pop-up window is displayed.
-
From the Business Unit drop-down menu, select the desired Business Unit.
-
Click Create. The selected Business Unit is added to the list on the Business Unit tab.
-
Repeat the above steps as needed to add this User Account to additional Business Units.